Thursday, October 31, 2013

Halloween Witches and Creepiness

I've mostly been working on some figures, polymer clay and Paperclay, during my spare October time, but I haven't managed to finish even one of those. I did get inspired to finish a Halloween page in my "Teesha" journal, a really creepy digital collage and a digitally colored Sweetpea witch. So just a little while before the witching hour of Halloween, I'm going to share those.


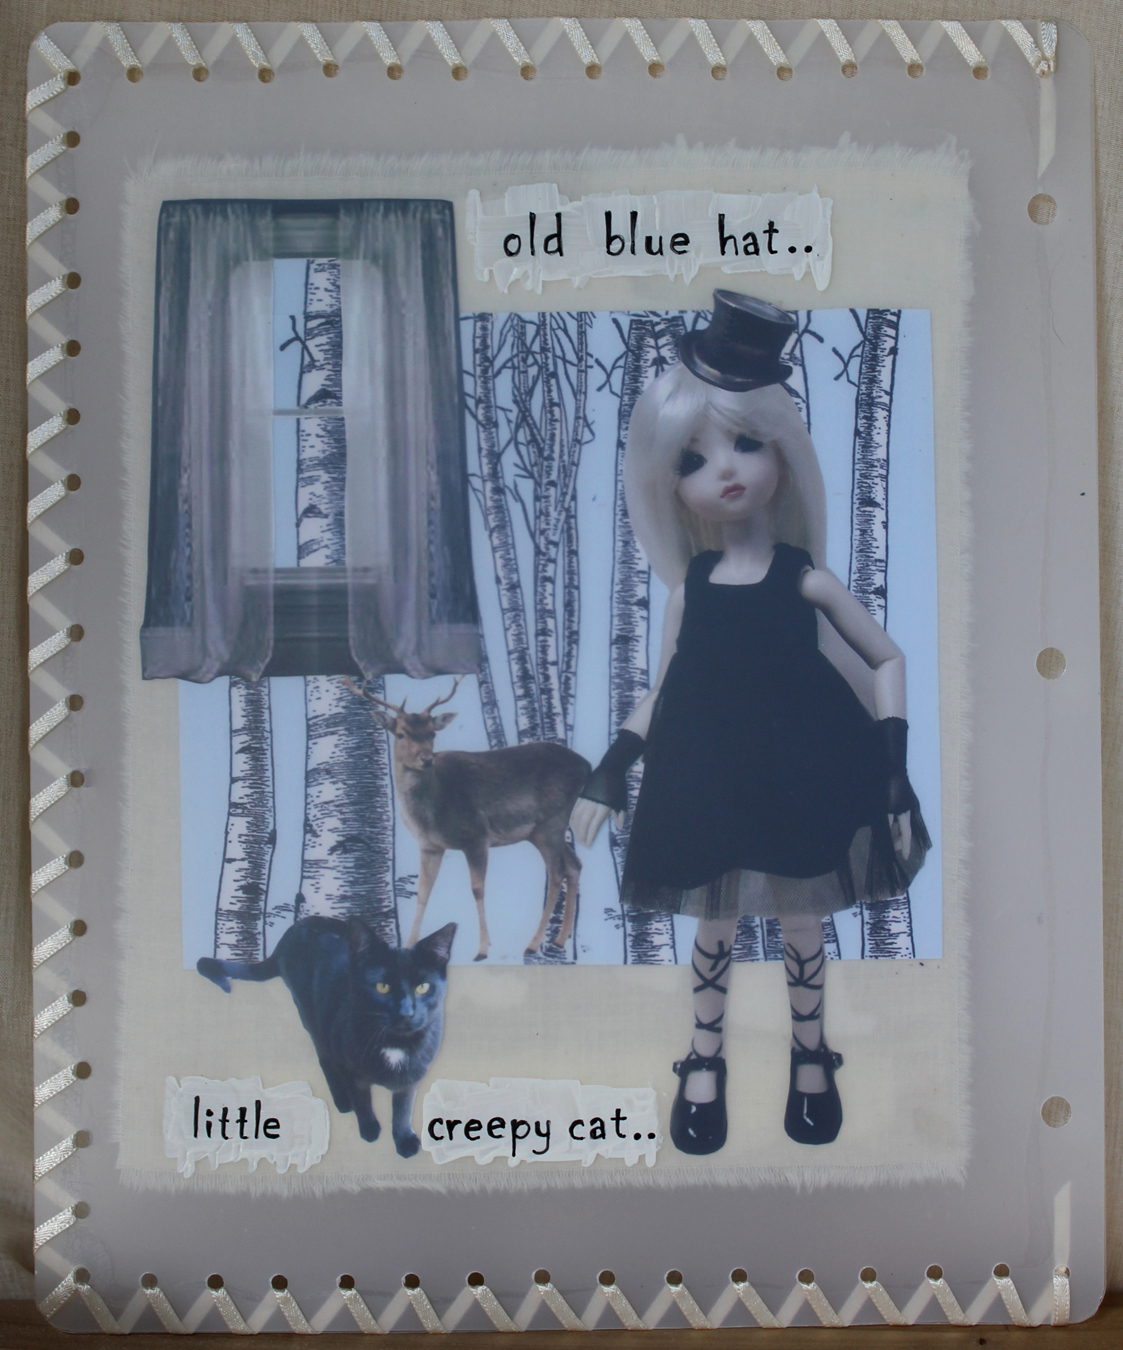
 I didn't know any "witch" nursery rhymes for my "Teesha" journal but found several really cute ones online searching on "witch nursery rhymes". She's a little different than the rest of the pages in that I left her BJD eyes. Her dress is from Raphael Tuck's Antique Paper Dolls, a book I've had for ages; Dover, I think. The pumpkin stamp at the bottom is from Queen Kat.


I've been working on this one for quite a while. All I knew I wanted to use was the photo Pam took at the Ohio Reformatory in Mansfield. I did an image adjustment on it to make it blue, took most of the glass out of the windows and added the moonscape. The girl, an online find, was standing in water which I turned to blood. Skeletons are a must for creepiness - I think these are from Flickr Commons. The Bleeding Hearts, flowers and otherwise, came from my desire for a creep factor.


This sweet little witch is a Sweetpea image. I've bought a ton of their witches and used only a few so I was quite happy using this one for some Halloween cards.

Thanks for visiting! 

Tuesday, October 22, 2013

Loving Photoshop Tutorials

I learn a lot from online Photoshop tutorials. My favorite kinds are the ones that don't include video as I frequently need to recheck the steps which is so much easier in a textbook format.
Well, I bought my third or fourth copy of Somerset Digital Studio recently and instead of getting bent out of shape that all of the lovely layouts were made from digital kits, I decided to go look at some of the digital kits. Being a bit of a slow learner I have a hard time jumping on a new bandwagon. Well, the kits are amazing and lots of brilliant designers have created so many papers and elements and clipping masks (still have to find a tutorial for what those are) that it's tempting to spend my year's craft allowance on the kits. And I will buy some but I also recognize when clip art has been artfully manipulated and I wanted to learn how to do that.
I fiddled around for a day or two using my digital coloring skills and getting nowhere and then I decided to look up a tutorial for coloring old photos. I read several but here's the one I liked the best: {Sorry that was a very bad link} . And here's what I did with it:


It's slick as can be and the really cool part is that I can go back into the unflattened file and change any or all of the different colors I used for a different look. And the selections are already saved because I used layer masks to add the color.

Saturday, October 5, 2013

Airless Chambers: October Newsletter Freebie Contest

There'a an October challenge going on over at Airless Chambers, the darker Rick St. Dennis blog. The challenge requires the use of Callista, who was given as a freebie in Rick's October newsletter. There's lots of eye candy currently on Airless Chambers as many of Rick's Design Team have posted their Callista projects. If you don't receive the newsletter be sure to sign up for future news. Callista is a still available for purchase in Rick's Etsy Shop here.

For my entry I created the haunted house background paper digitally and colored Callista digitally, all in PS CS5. She was great fun to play with!


Thanks for visiting!

Sunday, August 25, 2013

More Pages from My "Teesha" Journal

WOW! I just looked back at my posts and saw that I started my journal based on Teesha Moore's Fantastic 16 page Journal videos in May. It's closing in on September and I still have a page or two to go, but I just finished this two page spread and I love it! More to come!!


I've used paper doll clothing, faces from ball jointed dolls, eyes from fashion magazines and border papers from various sources: magazine pages, scrapbook paper, etc. The pages are painted with watercolor washes and then rubbed with pastels. The pen work was done with the black and white Sharpie water based poster paint markers that Teesha recommended. I found those at Dick Blick online. I even managed to squeeze in some rubber stamp fishies and the moon face from Artful Illusions.

Wednesday, August 21, 2013

Halloween Colors Challenge at Simply Betty Stamps

After I saw this sexy "Witch Mercedes" from Simply Betty Stamps, I knew I wanted to play with her. I hurried over and joined the SBS Facebook group and although Facebook always stymies me I did manage to find my way around and snag this cutie. All of the work was done in Photoshop. The spider web and the creepy spider are from photos I've taken and the trees are PS brushes from Trees_by_Horhew.


Thanks, Betty, for "treating" us to this delicious challenge!!

Friday, July 26, 2013

Smeared and Smudged Rock n Rolla Challenge "Walking On Air"

Hang onto your hats - I've got a bunch of pictures for this one. The challenge here was to use Kerli"s Walking On Air video for inspiration. It's the July 2013 Rock n Rolla challenge on Smeared and Smudged. I made a booklet with 8 small collages. I had meant to use cereal bags to enclose them as I had seen in Cloth, Paper, Scissors latest issue of Pages but I couldn't get that to work. I liked and wanted to duplicate the translucent look of the cereal bags so eventually came up with frosted shrink art plastic.
Two collages were mounted onto the front and back of a little piece of muslin and the whole thing was sandwiched between two pieces of the frosted plastic which had been trimmed to size. I used ZipDry glue for all of the gluing. Then thinking how easy it would be for the plastic to get snapped apart, I laced the edges with ribbon after punching all the holes. Here are the eight pages:


The stamp here is one of Ike's fabulous digis. This one is "Vaguely Goth". Isn't it just perfect?


 The last and hardest part for me was lettering phrases from the song onto painted section of the plastic. Hand lettering never gets any easier! I made a cover for the booklet because when I hauled out the old shrink plastic, I noticed that the edges that had been exposed to the light had yellowed slightly. Now if I were really in an experimental mood I could throw the whole thing in the oven and see what happened. No, I don't think so!

Thanks for visiting!!

Sunday, June 16, 2013

"Just Like a Pill" Musically Challenged Entry

Having arrived at this point in my life without ever seeing some of the music videos that are being offered up as inspiration for artwork, I find them quite stimulating. A fellow Smeared and Smudged crafter, Kapree, has started a blog Musically Challenged which offers a new video to work from every two weeks. Additionally the Smeared and Smudged forum offers a monthly video in their challenge group.
The Musically Challenged video for the current two week period is Pink's "Just Like a Pill" and here is my interpretation. All of the work was done in Photoshop CS5. The hallway walls were created using a stamp from The Stamping Ground morphed into perspective and then flipped to create two sides. The floor is a pieces of a stamp from Lost Coast. The figure is constructed from several of the mix and match figures in the book/CD Manga Females Clip Art, a lovely gift from my friend Pam. The costuming is by me. Bits and pieces - light bulb, pill, pill bottle, and bodies are from the internet.


If you've just happened along here be sure to check out the Musically Challenged blog. Great fun!!

Thursday, June 6, 2013

Sharon's Fabulous 16 Page Journal ala Teesha Moore

This is page 2 of the journal. It had been sitting waiting for a light bulb joke and a rainy day. Fortunately, just before it started raining I remembered that either Pam or I had thought of the song title I ended up using. If you haven't seen Teesha Moore's series of videos on creating a fabulous 16 page journal out of one 30" x 22" sheet of hot pressed water color paper, I hardily recommend it. Finding colored paper for the borders and sticking them on is great fun! That comes after sloshing paint on all of the pages, which is the state I showed in a previous post.
What I've tried doing with the pages I'm working on is using BJD faces from various sources embellished with mostly human eyes, using paper doll clothes and drawing fashion-like legs to lengthen the figures. Teesha said she felt using paper doll clothes seemed contrived to her although she did it on one of the pages she demo-ed. Since I adore paper dolls I wasn't put off by that and am considering titling the journal "Contrivances".
I also am trying to use words from older children's songs or books or nursery rhymes, although I'm finding that a little more difficult to match to the figures. I'm not a huge fan of Create, Believe, Art quotes for every journal page I work on. I think the process of doing the lettering is probably the most difficult for me. Pam gave me a few pointers a couple of weeks ago but I'm still struggling. That said, this is the best lettering I've done so far out of the seven I've attempted.


Thursday, May 2, 2013

April Projects for Smeared and Smudged.

Now that it's May, I'm finally getting around to posting the projects that went along with the April Guest Designer spot on Smeared and Smudged. I seem to revel in posting on the loneliest spots on the WWW and my blog gets high marks in that regard. There's not much to say about these other than that most of the work was done in Photoshop. Some of the five projects feature S n S's Goth Fairies digital stamp and I enjoyed using those very much.


Thanks for taking a look!

Wednesday, May 1, 2013

Junk Journals or Why just do it like everyone else when you can learn from every mistake in the book?

I rejoined Pam's Facebook group Art Journaling. One of the members, Patti Tolly Parrish, had shown some journals she was making out of her amazing GelliArts monoprints. She mentioned videos by Shannon Green about binding the journals so I watched those and Shannon mentioned some videos by Teesha Moore on her fantastic 16 page journal made from a 22" x 30" sheet of hot pressed watercolor paper so I watched those. All of which just sounded like FUN! In the very few minutes I've had on garden days and on those blessed rainy days when I couldn't possibly be expected to get wet since I might melt, I've been playing.
My first mistake was making too many signatures in too large a torn up hard bound book. Three signatures x seven sheets each x two pages per sheets x two sides per page makes for 84 sides of pages to get ready to journal on. I could have done the math first!!
The second mistake was using a shiny calendar for some of the pages. Not much sticks to it unless I rough up the surface.
And Shannon did say what glue to use but of course I had to try what I had which sort of made the pages curl.
But the great part is that it is so much fun and I have been able to relinquish control and just let things happen. Which is a major accomplishment for me! Here are a few shots of the sewn in signatures and some of the spreads I like a lot that won't require a whole lot more. Decorating the covers and the pages will come later.


This last one is the 16 page journal made from a sheet of watercolor paper. It's a nice break from the other journal as the pages are painted and need to dry. I'm going to follow Teesha Moore's instructions as closely as I can but I'm not all that good at following instructions. Always have to add something to make it my own!!

Garden 2013 - Episode 001

Even though I'm going to make this short and even though the photos are not top notch, who has time to take and edit photos anyway. We wanted to get some shots before April was over and the best light was long gone.

This is the long shot and shows the eight rows of four boxes each. There are four more to be built but we're not prioritizing that. All of the boxes have been weeded. Five or six of them were a bleeping 5 inch high carpet of some nasty little thing that detaches from its' roots and then has to be dug. The others responded pretty well to the hula-hoe and an occasional shovel for the errand dandelion or pigweed (that's a guess). We're trying something new this year: mowing rather than weeding the paths. The beds have about a 3 foot drop from the south side, where Ken is standing to take the photo and we have been flummoxed by the erosion during hard rains. This should help that!

The rhubarb bed. Some of the bigger plants need to be split but that's Ken's job.


We think this is the fourth year for the asparagus. It's completely wonderful! We've had three servings due to freezing weather and having to cover the bed. Last year we discovered it doesn't much like being covered so now we just eat whatever is up. Hopefully no more freezes but who knows??

One of our herb beds. The garlic seems very far along for so early. And last but not least, if Blogger will let me add another picture, are the peas. Two boxes of shelling peas, one of snow peas and one of sugar snaps. Two of the boxes needed the chicken wire and we just did that this week.
     

Sunday, April 7, 2013

Art Journal Page

The Smeared and Smudged journal prompt was Duality. What a great prompt and I was all set to get all deep and dark. Then a couple of the responses were bright and cheerful and I decided to join the party. I used my Balance set from Stampsmith. I love this set and haven't used it much.


Saturday, April 6, 2013

Yummy Black Bean Soup

I don't do food posts often and this will be short. This is a recipe for a pureed black bean soup with a dash of sherry. Friends we made while we were doing craft shows gave us the recipe years ago and although we love it and make it once in a while, I've always just used the canned black beans. Two days ago I hauled out the Joy Of Cooking and followed their instructions for cooking dried beans (not one of my skills).
So I am extremely proud of this batch. I grew and dried the beans, I grew and canned the tomatoes, and I grew the onions and garlic. So invested and so delicious!!

BLACK BEAN SOUP

3 cans black beans, undrained  ( I cooked 2 cups of dry beans and maybe could have used 1/4 c more.
1 large can of crushed tomatoes
1 can low-salt chicken broth
3 T sugar (I only use 1 T)
2 T Worcestershire sauce
Generous dash sherry
2 cloves minced garlic
Chopped onion to taste (I've used anything from 1 medium to 2 large)
5 slices uncooked bacon cut up

Simmer all ingredients for a minimum of 3 hours, stirring as needed. Blend until smooth before serving.

For toppings, use seasoned croutons, chopped hard cooked egg. I don't think you could go wrong here - sour cream, whatever!


Monday, April 1, 2013

April Guest Design spot on Smeared and Smudged

As a fairly infrequent stamper and paper player, I was honored to be asked to host the Guest Design spot on Smeared and Smudged's Challenger group for April. I was pretty intimidated by the two designers from January and February, Julia Vazquez and Leigh Snaith-Brunton, who both created just amazing projects and challenges. And seriously, I thought to myself that the only way they could make it more intimidating was to have Mark Gould go right before me. On March 1, I had quite a laugh as that was exactly what happened.

My project is a tunnel book that I'm calling "Into the Woods." I used three of the SnS Goth Fairies Set as the characters and altered them to fit the plan. Precious got a red hood, Cornelius got a wolf's head and Jenna got an axe. I had worked on the layers previously and had to rework them to  make them fit together as when I had used them before, they opened inside a book so they were all different sizes and contained other characters that had to be removed.

It was all colored in Photoshop with a little twist; for the flowers and some of the trees, I put real flowers and trees behind the top layer and then erased those sections so the real stuff showed through.

There are four layers, including the background layer. I tried to create additional depth by using pop dots to hold the characters off of their layers. Red Riding Hood had to be supported by a dowel that connects to the back layer. My basic plan was to make a cohesive scene (the path, rolling grass and background) and then add additional elements to each layer as the viewing holes got smaller. Since each layer needed to be able to support itself and I was printing onto photo paper, I adhered each layer to heavy black card stock and used 1/2" x 1/2" wood pieces cut to length to hold the layers apart.


Sunday, March 31, 2013

A Few Journal Pages

These are a few of my Art Journaling pages I've done in the last few weeks for the Art Journaling Every Day group at Smeared and Smudged.


I seem to find lots of inspiration in song lyrics.

Thursday, February 21, 2013

Smeared and Smudged Challenges

Smeared and Smudged is a forum that my friend Pam introduced me to. I know, I know, don't end a sentence with a preposition but sometimes it's just impossible to back out of! Anyway, they foster the alternative stampers - the ones who love vampires and Steampunk and zombies and gore and Halloween every day of the year. And they are the nicest, most nurturing folks! They also have a challenge blog Smudgy Antics and a shop Smeared Ink. I haven't gone hogwild participating other than doing their yearly 31 Days of Halloween in 2011 and 2012. But the past few weeks I've played along with a few of their monthly challenges.


For the first piece the challenge was to interpret a video called You Da One by Rihanna. The particular challenge is called the Rock and Rolla Challenge and features a video to use as inspiration once a month. I love taking really old art pieces like this Titian "Venus of Urbino" and playing with them digitally so this was so much fun! The video wasn't anything I've heard or seen before but I find myself humming and bouncing to it all the time now!


The challenge for the second piece was from their Guest Designer for February, Leigh Snaith-Brunton and basically anything Alice worked. I had been working on these (mostly) Rick St. Dennis images for a couple of weeks with this in mind. The last piece of the puzzle was Rick's Dormouse that I had requested from him. So in the end this came together very nicely. I will be printing it out to put into my over-sized Alice altered board book. That's my woods in the background with a couple of stamped trees to integrate it with the foreground. Another of my favorite techniques!!

The Incredible Fairy Queen Palace

I'm quite a bit behind here on my blog so I'm going to do several posts today. As I said in the title, this is one incredible digital stamp that Rick St. Dennis has in his Etsy stop here . I had so much fun making up stories for each wing of the lovely palace that was constructed with stardust and magic in an old gnarly tree. I intend to do a lot more with this, adding all sorts of naughty and nice fairies to reside here but currently the only occupant is Rick's Dormouse .


The background I've used is a sunrise shot off the deck of our house in Washington with some color variations applied to turn it into dusk. I adore fairytales and fantasy and in my mind this couldn't be more magical!

Tuesday, February 12, 2013

A very Special Birthday Card

I will be 70 in a couple of days. The years certainly sneak up on you. And to paraphrase the Dowager Countess from Downton Abbey, "At my age, one must ration one's excitement." But I got a very nice surprise in the mail today - one of my sister's collages as a birthday card. At about 9" x 12" it may be the largest one she's ever made and it's spectacular. She tells me the quote is from Mark Twain and it's a doozie too. I hope you will enjoy seeing it as much as I enjoyed getting it!!


Thank you, my wonderful sister, Kate!

Thursday, January 31, 2013

Dragon Gatefold Card


This is a card for the Smudgy Antics challenge to make a gatefold card. I've used a Stampers Anonymous arch which totally lent itself to this type of card, a Teresa Sherman stamp, Dragonlets and Me, and colored it all digitally. I made the cover dragon from metallic polymer clay.


Wednesday, January 23, 2013

A New Altered Board Book

The places I frequent on the WWW have had a flurry of Alice in Wonderland activity. Rick St. Dennis just released some new AIW stamps in addition to his already fabulous selection. Donna Muninger, who hangs around some of the same places I do, just posted an amazing Alice in Wonderland card here. And I've been missing playing with the Mad bunch since I finished my Alice altered book here . So I've started another! The first one followed the story in a linear way and used the original Tenniel illustrations. This one will be much less controlled and I hope to sample illustrations from lots of current digital artists.
To start off I've used Rick's new Alyce from his Randi Dandi line and the "down the rabbit hole" scenario. This is a big book with at least 21 double page spreads so I'm hoping the parameters I've set will hold my interest.


Thanks for visiting!!

The Art of the Kiss


The book form was purchased quite a while ago from Somerset Studio if I'm remembering correctly. Most of the papers were from scrapbooking paper pads although a few of the blue ones I created digitally. I do not know why that first paragraph links to the first picture???  But if you're looking be sure to zoom in to the pictures to see the quotes. I worked to coordinate them with the artwork.